Tag Archives: meat

Burger a lot

One of the things I like to take the time and effort of making is making my own hamburger. Not on the level of slaughtering my own cow and pig or from chunks of meat and fat to my own specifications, but at the least from mince. I’m not fond of ‘just meat’ burgers; I like my burger seasoned. I also don’t just have beef burger; my burgers are a mix of beef and pork ground meat – 2 kg beef to 1 kg pork. (So this will always be a minimum of 3kg meat.) This was a recipe that my parents used to make, and we lost at one point, until I decided to try recreate it. I remember my mother soaking slices of bread in milk while preparing the other seasonings, but I use breadcrumbs instead.

Since I usually make this as a large batch, the proportions of everything else is ‘per kilo.’ The last batch I made was 9 kg of meat.

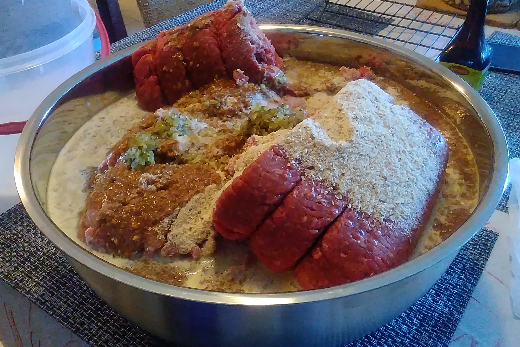
Maybe I should have pre-mixed the pork and beef first, or at least pulled it apart in chunks and sort of distributed them a bit more evenly, but I was rushed. That’s a huge metal basin; I’m really happy I found it in Costco. The Housemate didn’t think I would need something this big, but The Husband knows about my periodic urges to ensure the freezer is stocked with something delicious, so… It’s only fortunate that this just fits the bottom of my fridge too, because this has an overnight marinate time before I shape the patties.

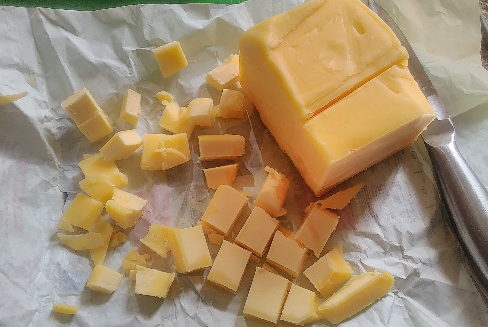
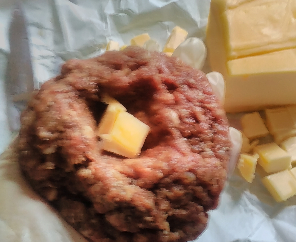
For this particular batch I did something that I thought might make the burgers yummier when cooked, which was cut up chunks of butter and a cube or two in the middle of the patty.

I reform the meat into a ball again and flatten into a patty.

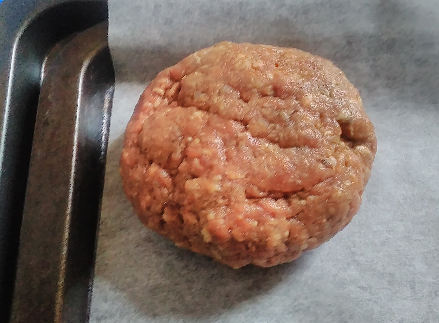
Which I then put onto a tray lined with baking paper for freezing. I usually put two layers of patties before putting them to freeze.

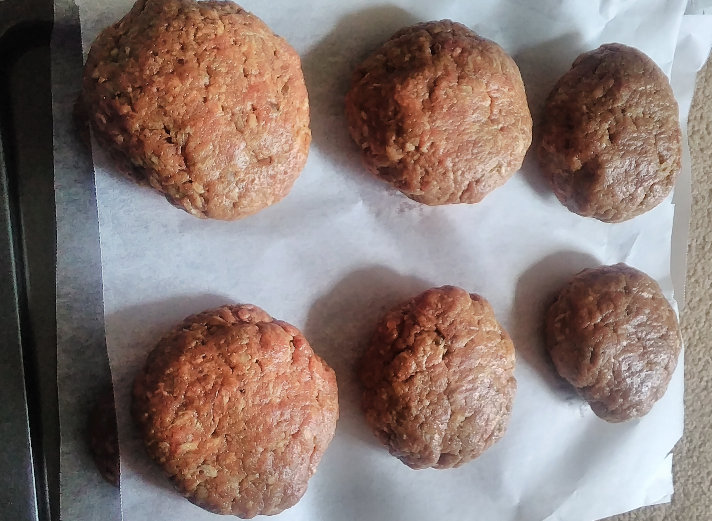
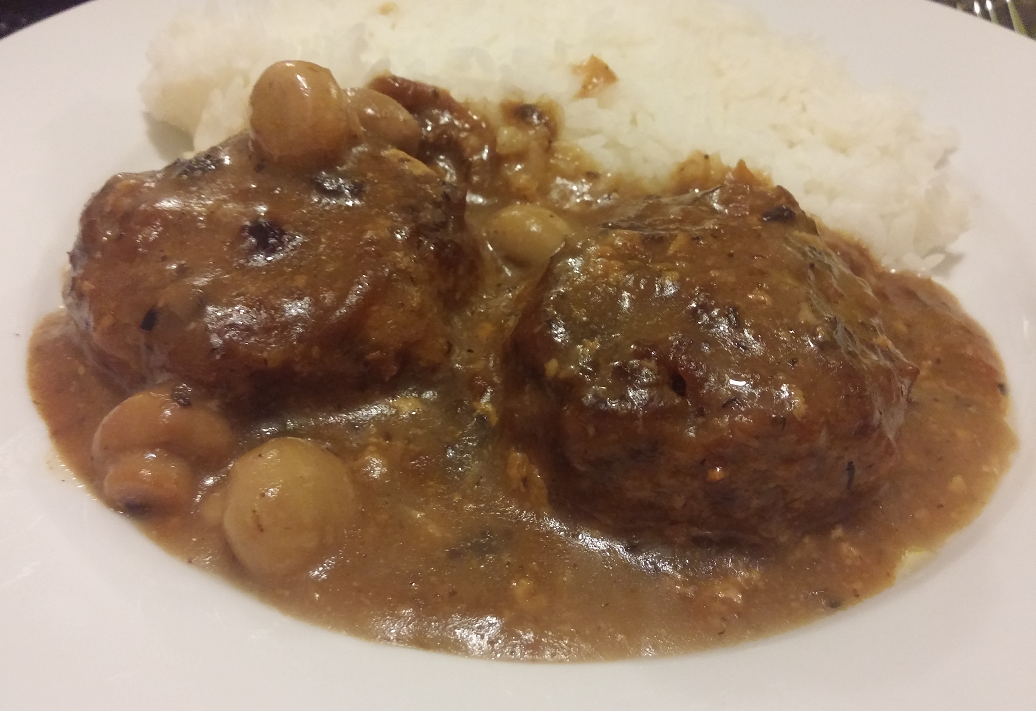
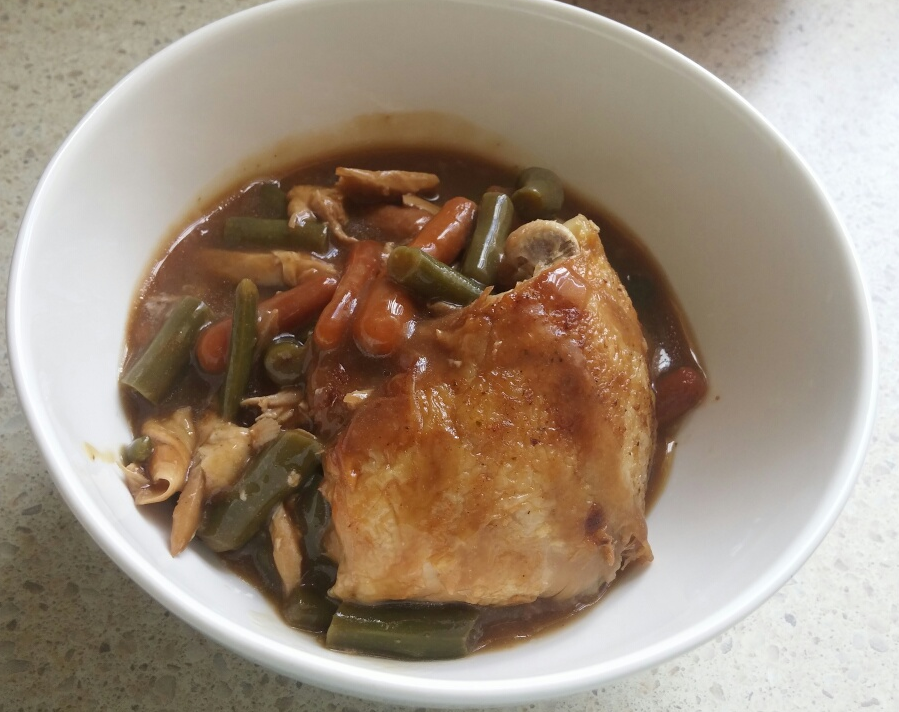
For a batch as large as the one I made (I sat in front of the TV to watch while making this, so I had newspaper spread on the carpet) be prepared to set aside at least two days of prep work. For the smallest possible batch, you won’t need as long – start in the morning, marinate through the day, fry up burgery goodness for dinner! I’d suggest making smaller, flatter patties than the steaks I made though for putting between buns! I tend to cook these up in the oven with a sauce as a boneless alternative to steak (like my Gamer Wife’s Hamburger in Gravy.)

You can also make large batches of meatballs with this, or make patties and meatballs, to give you even more dinner options!

Rory’s Burger

You’ll need at least 3kg of meat, so the proportion of the patty is up to you! Freeze any patties you don’t think you’ll need for future meals. The proportion of beef to pork I use is 2kg of beef to 1kg of pork, and this is the base recipe.

Prep Time 2 hrs
Total Time 2 hrs 6 mins
Course Main Dish
Cuisine OAMC / Freezer fillers, Western

Ingredients

  • 2 kg minced beef meat
  • 1 kg pork mince
  • 1 package dry onion soup mix Can reduce to 1/2 package per kilo of meat.
  • 1 tsp garlic powder per kilo of meat
  • 1/4 to 1/2 cup breadcrumbs per kilo of meat
  • 1 tsp Worchestershire sauce per kilo of meat
  • 1 tsp ground black pepper per kilo of meat
  • 2-4 teaspoons sweet pickle relish per kilo meat, use tea spoon, the spoon used for stirring your coffee.
  • 1/3 cup ketchup I use Heinz brand
  • 1/4-1/3 cup milk per kilo of meat
  • 1/8 cup dried onion flakes per kilo of meat
  • 1-2 eggs per kilo of meat

Instructions

  1. Open packages of minced meat and divide into smaller clumps. Place the clumps into a large bowl, distributing the beef and pork into more-or less even proportions.
    Add the bread crumbs. Set aside the bowl.
  2. In another bowl add all other ingredients except the sweet pickle relish. Mix it all together with an electric beater or in a blender.
  3. Pour the mixed seasonings on the meat and breadcrumbs. Add sweet pickle relish.
    With gloved hands, work in the seasonings into the meat and breadcrumbs until well incorporated and everything looks mixed evenly.
  4. Cover bowl with plastic wrap and place in fridge. Length of time depends on the amount of meat used. If it’s the minimum 3kg, 4-6 hours of marinate/sit time; more than that will need overnight at least to allow the meat’s flavour to absorb into the meat.
  5. Prepare baking trays: line trays with baking paper. If choosing to add butter cubes, start cubing butter.
  6. Set out your work area with the bowl of meat and trays.
  7. Take into gloved hands the amount of meat mix you want for your patty. If you want butter in the middle, place a cube in the middle of your ball of meat, reform the ball and press slightly into patty shape.
  8. Place patties on the prepared trays. If wished, place another layer of baking paper on top and another layer of patties; no more than two layers of patties. Place another layer of baking paper on top to protect the patties and put in freezer, if freezing.
  9. Freeze for at least 8 hours, before removing burger patties to zip lock bagged portions.
    Use burger patties as you wish. Recipe is also good for meatballs (freeze in the same way.)

Pineapple Chicken

This is a lovely, summery dish that goes for a savoury sweet flavour instead of the usual sweet-n-sour. Unusually, it also uses evaporated milk as part of the broth, yet doesn’t end up soured. In the Philippines, we call this pininyahang manok. I think it makes a good midweek dinner; and my kids definitely agree.

Continue reading

Pork Sausage with Apples n Onions

This is an adaptation of the apples n’ onions recipe that I read about in Farmer Boy back when I was in grade 5. it makes for a very straightforward and flavorsome meal. My husband prepared this while he was out field and he proudly reported that some of the guys came back for thirds – everyone, apparently had seconds!

Continue reading

Gamer Wife Hamburgers in Gravy

This is one of my ‘I’m busy and I need to get food on the table’ go-tos. I usually make this with home made hamburger patties; but I reckon you could do well with store-bought. With a hearty gravy with mushrooms, I almost never have leftovers – and if there are any, it’s meant for my hubby’s lunch the next day. Well, if he leaves any – he’ll walk in through the door and one of the things he’ll ask me is when it’s ready to eat.

Continue reading

Honey Mustard Chicken Bake


My family looooves this, because it results in such a flavourful and tender meat dish. It’s also a bit expensive because of the use of whole jars of ingredients (at least, over here in Australia) so it’s a treat. For folks who are looking for a quick, easy main to serve for a crowd of guests, this is a good recipe to go for (and is similarly easy to scale down.)

Continue reading

Gamer Wife Chicken Bake

chicken_carrots_beans

I make no secret of the fact that I am a gamer, and that a lot of my work also requires me to be in front of the computer (or Cintiq) and sometimes, the work here is very hard to interrrupt! Or the party grind session.

I call this chicken bake this because I realized one afternoon, after immersed in Lineage II that I hadn’t thawed any meat and the children had just come home. This meant – oops – that dinner would need to be ready, or at least cooking by the time Rhys got home! My darling man would be tired and hungry, and my pride refuses to not at least have some food warm and ready!

Continue reading

Chicken Sopas

chickensopas

Quick, light and easy, this soup suits both cold nights and summer days back in the Philippines. Some versions include using diced Tender Juicy Hotdog (which resembles the red-covered frankfurter, but tastes different) or diced ham. This is the simplest version in the family and is also a nice side dish, especially if the chicken is cut into even smaller cubes.

It can also be made with chopped up store-bought roast chicken meat, cutting down the cook time even more.

Continue reading

Pop Soda Sticky Chicken

sodachicken01

This chicken recipe uses a can of cola, orange soda, or Mountain Dew as a base. I’ve also used this as a recipe base for a slow cooker pork roast (adjusting the amount of ingredients to suit.)  This was a huge hit with the kids and adults alike.

Continue reading

Japanese Style Curry Bread


One of the things I like to eat here in Australia are meat pies. They fit in your hand, are a full meal in one, are served warm, and with a drink can be very satisfying. I’m also fond of pasties for the same reason. I mean, a food you can eat with one hand and a book or magazine in the other is tops for me.

Japanese Curry Bread is one of those delightful concepts where they took a good thing to an entirely new level. Instead of baking the stuffed bread, they dip it in egg, coat in panko bread crumbs and deep fry. Result: Crispy, savoury stuffed doughnut filled with comfort food. How could I not try this? I’ve technically eaten something like this in the Mini Stop shops back in the Philippines, but the dough left my mouth feeling dry; too much baking powder, perhaps? Nevertheless, they were filling, and cheap. But that’s all the way over across an ocean, and I’m in the Land Down Under. So, after my brother-in-law introduced me to a manga called Addicted to Curry, I resolved to make my own. I’m not as obsessive about curry as the folks in Addicted to Curry are, so I use the pre-packaged Japanese roux.

Continue reading

Lumpia Shanghai

It’s been years since I made some; and none since I moved to Australia. So I made some. The meat mixture makes a good meatball too, but will need some breadcrumbs as binder. Consider the recipe below as a basic starter, and feel free to add other vegetables and seasonings and ingredients for your own lumpia.

I also put in how I wrap them, in case anyone needs a step by step. I hope it helps ^_^

Enjoy!

Continue reading

Homemade Wontons


As part of their holiday ‘fun thing’ I taught my eldest how to make chicken wonton filling / chicken meatballs. Eldest boy helped wrap up a few, but I had to take over or else we wouldn’t have dinner on time! Happily my little budding hearth witch mastered the wrapping of wontons quickly. We still have meat so we’ll make a packet of wontons to freeze, and make meatballs out of the rest.

Continue reading

Chicken and Pork Adobo Modena Family Style v2

I get requests to share my family’s adobo recipe fairly often, so I figure this is easy to drop in.

This dish can take up to two days of advance preparation, but only if resulting in the crispy Adobo version at the very end – something that doesn’t happen very often in my household because by the time the adobo is finished cooking and falling apart tender, everyone’s starving, Rhys comes home to delicious cooking smells and everyone wants to EAT IT NOW.

If making this for dinner, I start at about 10 AM and leave it simmering on the stovetop for the whole day on the lowest fire possible. At about an hour before dinner, that’s when I remove the chicken bones and gristle, and add the soy sauce and final seasonings. The long cook time results in incredibly flavourful and tender meat. Rice is cooked about half an hour before dinnertime.
This recipe can result in two different types of adobo: the usual Adobo stew, or Crispy Adobo Flakes.

Stew-consistency adobo, when cooled, has the sauce turn into a jelly. This makes it ideal for taking along on school lunches to be eaten even unheated with rice or bread, on road trips and picnics, as the vinegar and salt content of the dish helps preserve the meat against spoilage, even in the hot tropical Philippine climates. Adobo-style cooking of meat has been traditionally one of the favoured methods of preparing ‘travelling food’, especially when the only way to get around was via water buffallo or oxen pulled cart. The versions for such old-style travelling tended to be heavier on the cracked peppercorns and had a higher amount of fat and bone to result in more of the preserving jelly, and the meat was not cooked to falling-apart softness, but cooked through and left on the bone for ease of serving and eating while on the road.

Cooling the adobo to remove the extra fat can be done if desired, but I feel some fat should be allowed to remain for flavour.

If you wish, you can also use stewing cuts of beef – either in substitution for pork or in addition to the meats already listed.
Ingredients:
At least 1kg each of:
Pork meat, cut into cubes. Some fat is recommended, but if you have only lean cuts of meat, go with adding chicken with skin on. You can skim the fat off later if it’s for a dinner and not a picnic. (See above note about resulting travelling/picnic adobo) Additional note: you are very likely to get a lot of rendered oil from the fat.

Chicken with skin and bone (thighs or drumsticks are good. Make sure feathers are fully removed from skin!)

For every kg of meat 1 cup each of
Marca Pina, Maggi, Knorr or Silver Swan brand soy sauce
Marca Pina or Datu Puti brand brown cane vinegar
(The brand is important, as this results in the flavor sought. Do not substitute Kikoman or other soy sauces, as the flavor of Kikoman is very different from the soy sauces named above! The brands named should be available in either Asian or Filipino food stores.)

For every kilo of meat: At least 1 head, or 1 and a half head of garlic, peeled, crushed and chopped. If using pre-chopped garlic, slightly heaping 1 teaspoon (the one you use in stirring your coffee or tea, not the measurement.) (Try to do it this way the first time. Substituting garlic paste or dried garlic powder can be done in future cooking.) The more garlic in adobo, the better.

Cracked pepper and salt to taste.

Optional additions:
a) 1-2 bay leaves, added during simmering stage and removed before serving
b) Chili peppers
Long white mild chili peppers; 1-3 per batch of adobo (usually whole)
Red or Green long chili peppers, as spicy as desired, whole or chopped
3-8 birds eye chilies, either whole or chopped. Or any other chili of choice.
Chilies are added after seasoning with soy sauce, salt and pepper.
c) Potatoes, peeled and chopped into quarters or eighths. Add just after seasoning with soy sauce, salt and pepper to taste.
d) Del Monte or Dole canned pineapples, either chunks or as slices (Brand is again, important, to achieve the sought-after flavour, as these brands are sweeter than Sun Gold or Gouburn / Australian brand pineapples.) Add 10 minutes before serving.

Method:
1) Boil chicken in just enough water to cover the chicken meat, adding the necessary amount of vinegar and garlic until the meat has just cooked, but is not yet soft.

2) Add the pork with its’ share of vinegar and garlic, adding more water to just cover the meat again. Season with some pepper and about a tablespoon of salt.  (Adding the pork later after the chicken is so that the chicken fat in the water helps soften and flavor the pork; an especially important step if using lean cuts of pork. if the cut of pork has some fat, simply put it all in the pot together, merging the steps.)

3) Simmer on low heat and allow the broth to boil down, then add enough water again to just cover, stir the pot. Cover the pot, and allow to boil down again. Keep doing this until the meat is falling-apart tender, and the broth/sauce is yellowish in hue. If you wish to remove the chicken bones and gristle from the adobo, this would be a good time to do it.

4) Add the required amount of soy sauce. Season the adobo with salt and pepper as desired (you can also add chopped bird’s eye chilies at this point, if you want a spicy adobo.)  Adding the soy sauce too soon makes the meat tough, we’ve found, so that’s why we cook it in vinegar-water-garlic/onion and pepper first. Reduce the liquid to sauce or stew consistency.

At this point, you may serve the meat over hot white rice,

or

allow the sauce to boil away so that you can shred the meat into strips and fry the meat in its’ own oils and juices for Crispy Adobo Flakes.

Fry shredded adobo meat in batches until crispy before eating with rice. The cripsy version is also popular in the Philippines as a beer-side dish, like peanuts and chips.

Crispy Adobo can also be stored and refrigerated for box lunches.